本文档描述了一个关于单据数据合并展示的技术实现方案。具体为将两个单据(kdec_demobill_1和kdec_demobill_2)的头数据合并后,展示在第三个单据(kdec_demobill)的单据体中。通过注册插件并监听单据体控件的数据绑定事件,重写相关方法来实现数据的重新取数和分页展示。文中详细说明了实现过程,包括新建单据、注册插件、重写entryGridBindData方法以及实现单据体数据填充的逻辑。最后,还提供了效果图和注意事项,并建议参考开发平台的学习资料来进一步理解标准单据体的使用。
关键词:单据体
一、需求
将单据1(kdec_demobill_1) & 单据2(kdec_demobill_2)的单据头数据合并展示到单据(kdec_demobill)的单据体中。
二、思路与方案
单据体表格本身提供绑定数据事件,且支持按分页绑定,故我们可在页面插件中对单据体控件添加监听:addDataBindListener ,然后重写 entryGridBindData 方法即可。
三、实现过程
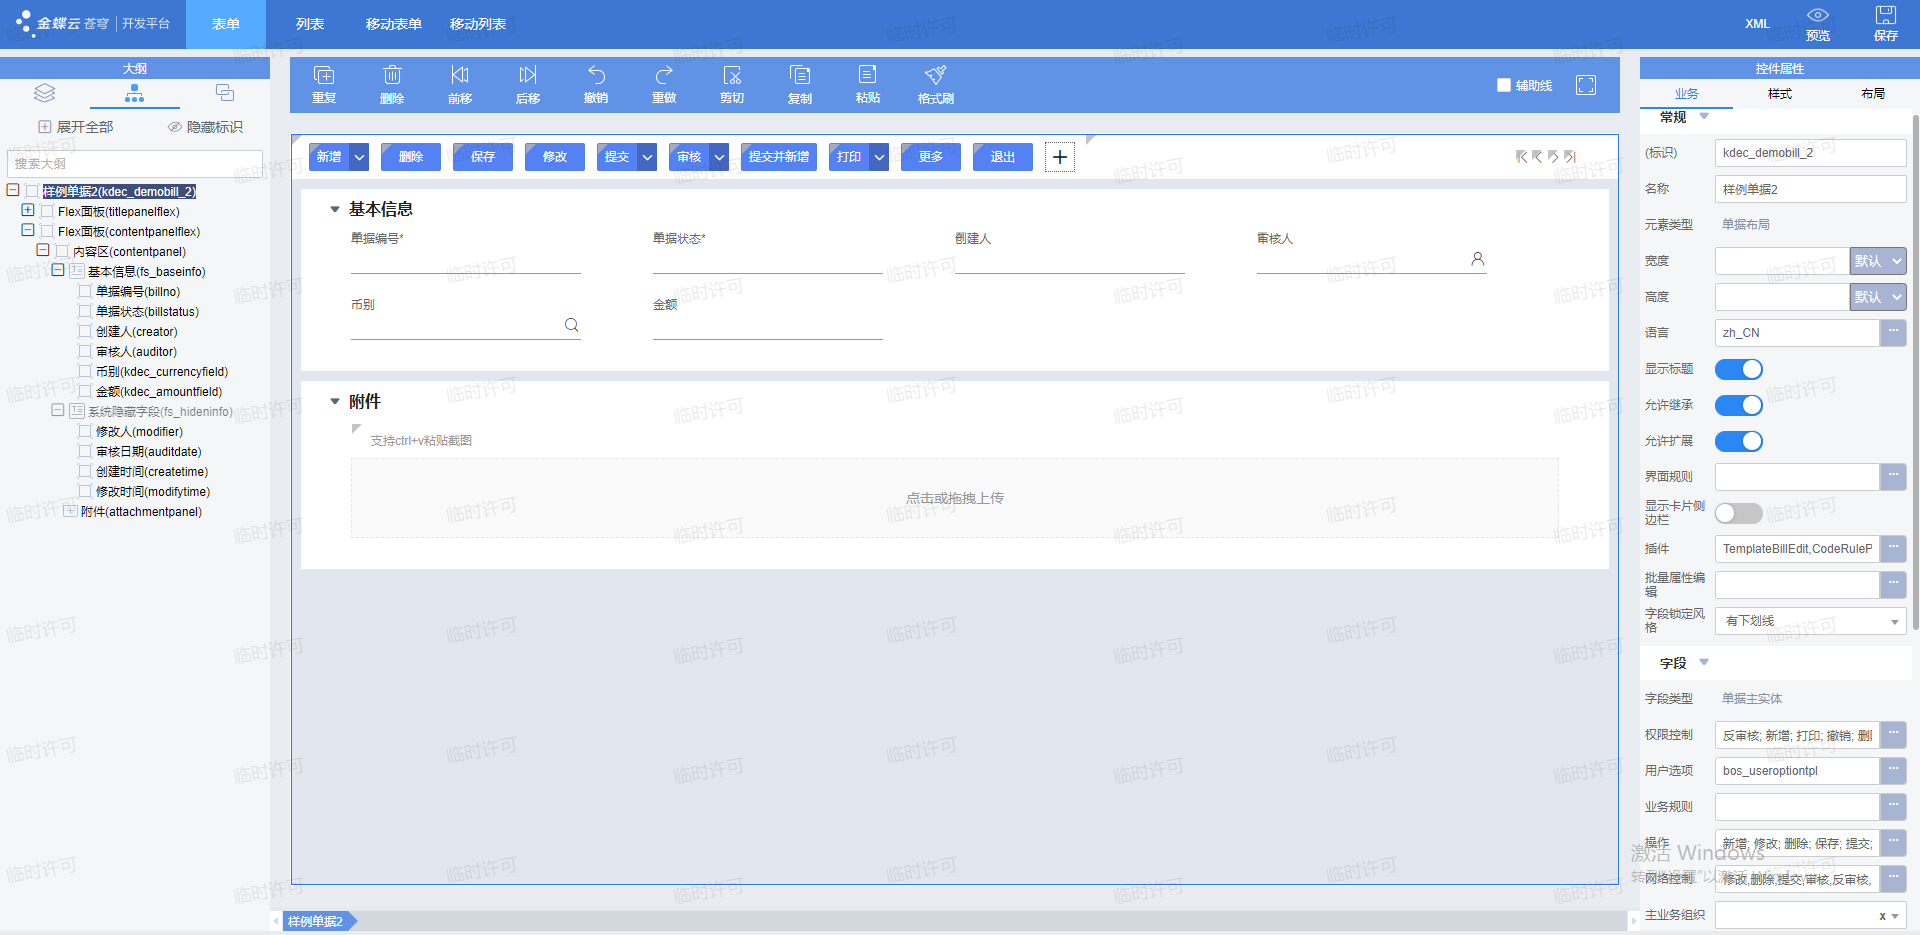
1. 新建单据,其设计器界面分别如下图所示。
样例单据:kdec_demobill,单据体分页展示,每页5条。

样例单据1:kdec_demobill_1,放置文本 & 小数控件即可。

样例单据2:kdec_demobill_2,放置币别 & 金额控件即可。

2. 在样例单据(kdec_demobill)上注册插件实现业务功能:对单据体控件添加监听,再重写 entryGridBindData 方法实现单据体重新取数逻辑。
	@Override
	public void initialize() {
		super.initialize();
		EntryGrid entryGrid = this.getView().getControl(KEY_ENTRYENTITY);
		entryGrid.addDataBindListener(this);
	}

	/**
	 * 单据体表格绑定数据事件, 按分页绑定
	 */
	@Override
	public void entryGridBindData(EntryGridBindDataEvent e) {
		EntryGridBindDataListener.super.entryGridBindData(e);
		this.custEntryGridBindData(e);
	}

	/**
	 * 单据体填充自定义数据
	 * @param e
	 */
	private void custEntryGridBindData(EntryGridBindDataEvent e) {
		// 获取表格的状态对象
		EntryGrid grid = this.getView().getControl(KEY_ENTRYENTITY);
		GridState entryState = grid.getEntryState();
		// 每页展示的起始记录序号
		int startIndex = 0;
		// 每页展示的尾记录序号
		int endIndex = 0;
		// 单据体展示数据的总数
		int rowCount = this.getRowCount();
		// 总页数
		int pageCount = 0;
		// 是否分页
		Boolean needPaged = grid.isNeedPaged();
		if (needPaged) {
			pageCount = rowCount / entryState.getPageRows().intValue() + (rowCount % entryState.getPageRows().intValue() > 0 ? 1 : 0);
			if (pageCount == 0) {
				pageCount = 1;
			}
			if (entryState.getCurrentPageIndex().intValue() < 1) {
				entryState.setCurrentPageIndex(1);
			} else if (entryState.getCurrentPageIndex().intValue() > pageCount) {
				entryState.setCurrentPageIndex(pageCount);
			}
			startIndex = (entryState.getCurrentPageIndex().intValue() - 1) * entryState.getPageRows().intValue();
			endIndex = Math.min(startIndex + grid.getPageRow(), rowCount);
		} else {
			endIndex = rowCount;
		}
		List<RowDataEntity> objs = new ArrayList<RowDataEntity>();
		List<Object> rows = new ArrayList<Object>();
		// 重新实现kd.bos.form.control.EntryGrid.getEntryDataEntities(int, int)方法以重新绑定数据源
		DynamicObject[] dataEntitys = this.getEntryDataEntities(startIndex, endIndex);
		if (dataEntitys != null && dataEntitys.length > 0) {
			// 单据体数据类型
			EntityType entityType = this.getModel().getDataEntityType().getAllEntities().get(KEY_ENTRYENTITY);
			for (int rowIndex = 0; rowIndex < (endIndex - startIndex); rowIndex++) {
				objs.add(new RowDataEntity(rowIndex + startIndex, dataEntitys[rowIndex]));
			}
			if (grid.getRuleCount() > 0) {
				// 触发分录规则
				RuleContainer<FormRuleExecuteContext> ruleContainer = getView().getService(RuleContainer.class);
				ruleContainer.raise(new RaiseEventSource(RaiseEventType.Initialized, objs, entityType), new FormRuleExecuteContext(getView()));
			}
			for (RowDataEntity obj : objs) {
				BindingContext bindCtx = new BindingContext(entityType, obj.getDataEntity(), obj.getRowIndex());
				rows.add(grid.getRowBindValue(bindCtx));
			}
		}
		e.getData().put("rowcount", rowCount);
		e.getData().put("rows", rows);
		e.getData().put("pagecount", pageCount);
		e.getData().put("datacount", rowCount);
	}
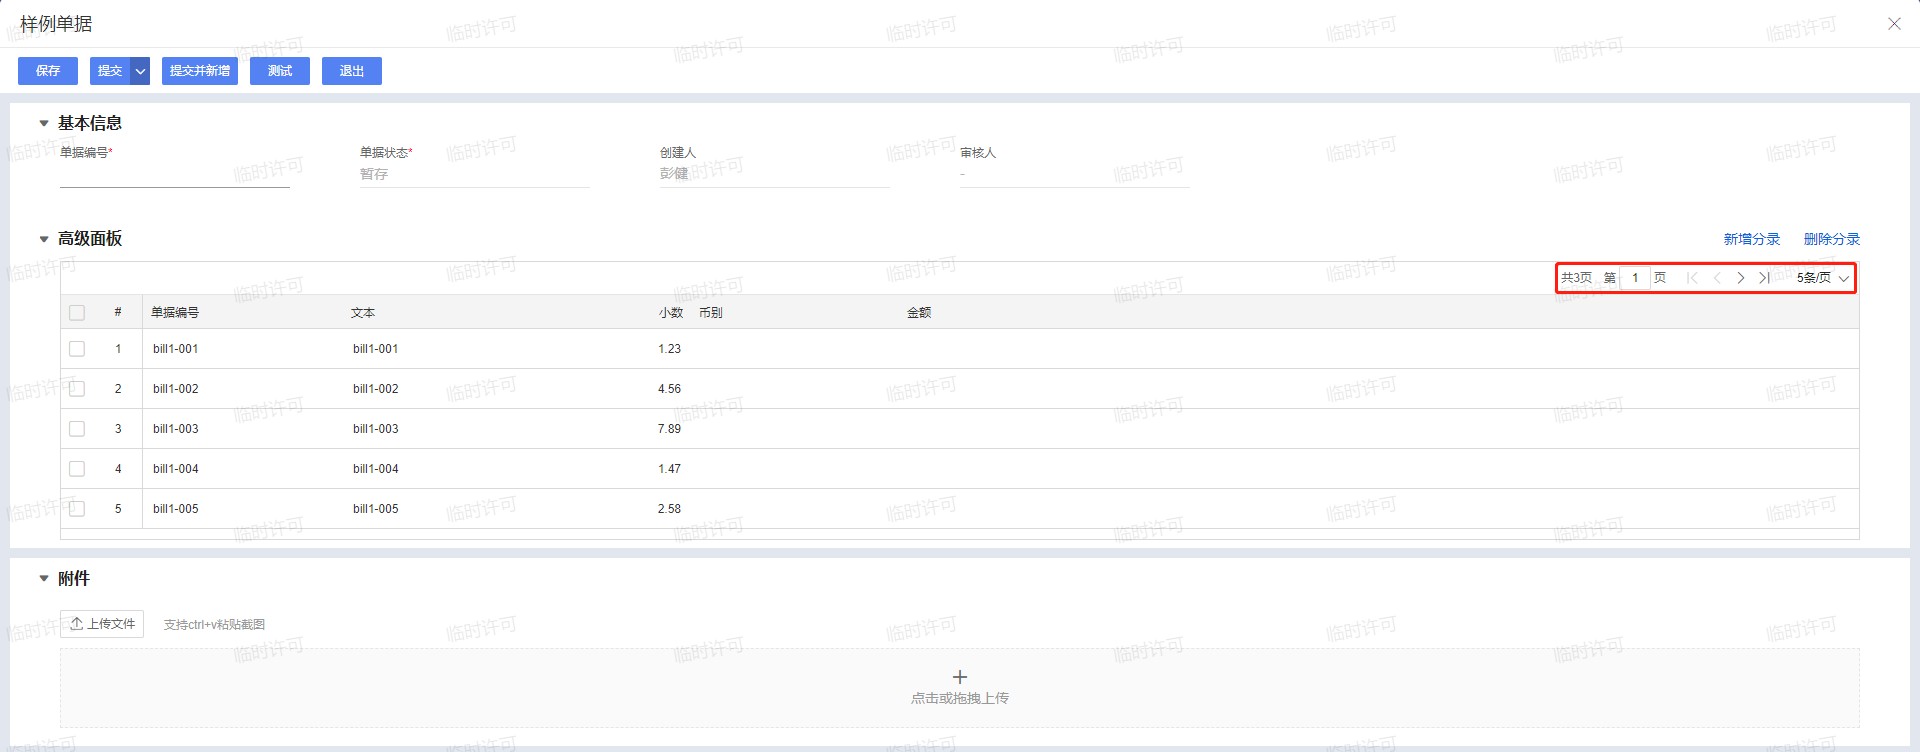
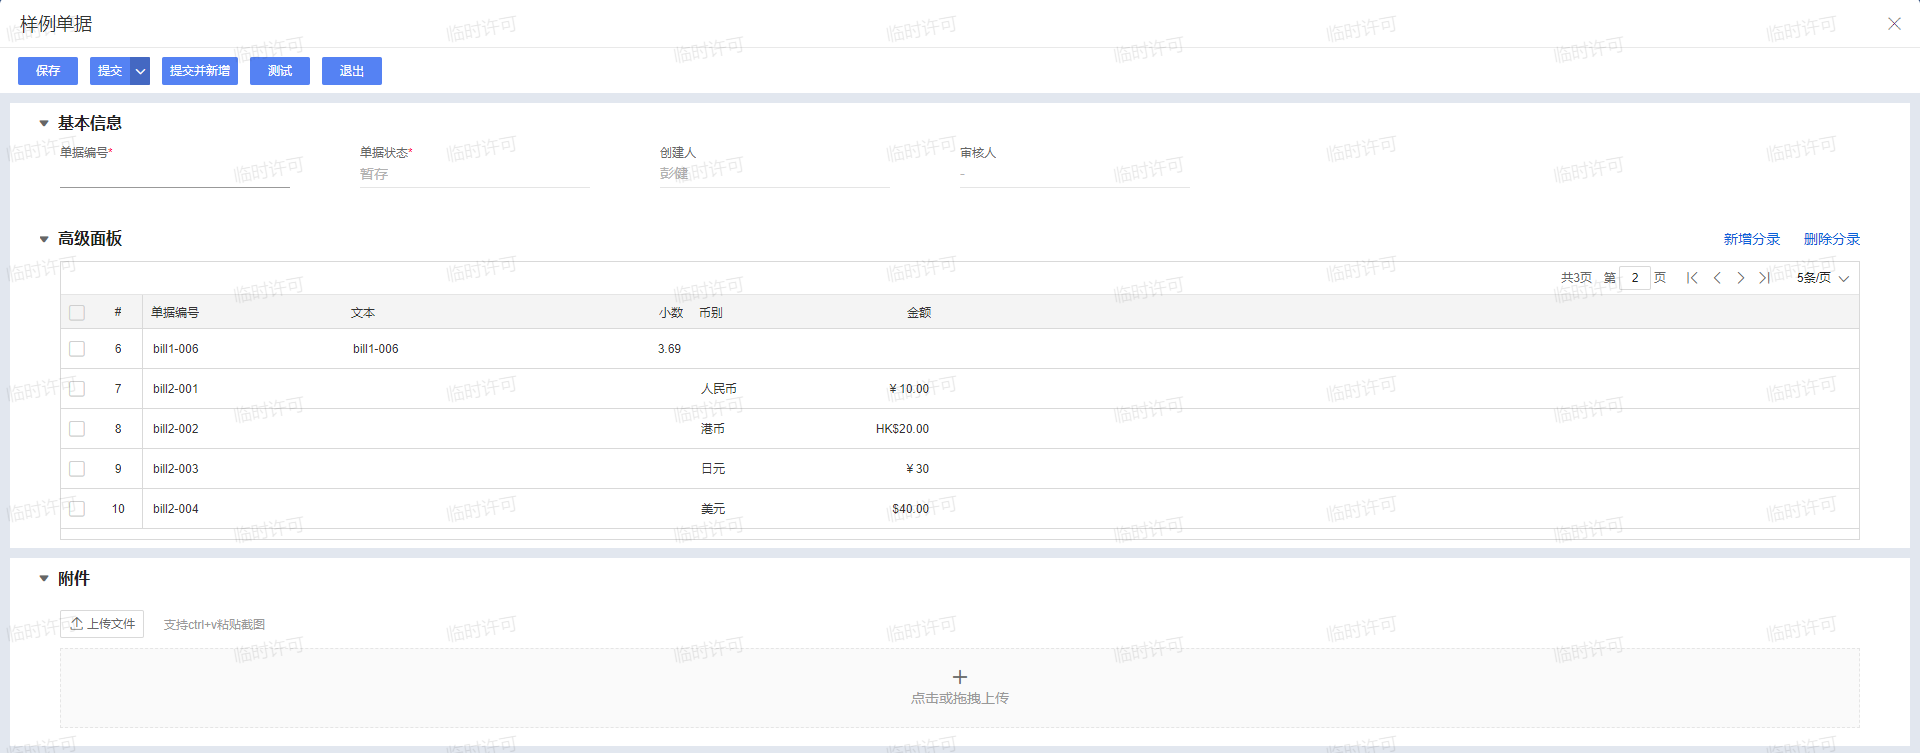
四、效果图
样例单据1业务数据

样例单据2业务数据

合并展示在样例单据单据体中的数据


五、开发平台版本
不限
六、注意事项
本样例附件中仅含样例源码,页面较简单,请自行新建,然后注册插件,重启服务即可复现样例效果。
七、参考资料
标准单据体控件填充自定义数据.zip(3.01KB)
推荐阅读

